Zelda: Breath of the Wild - Entry 3: Activating Towers

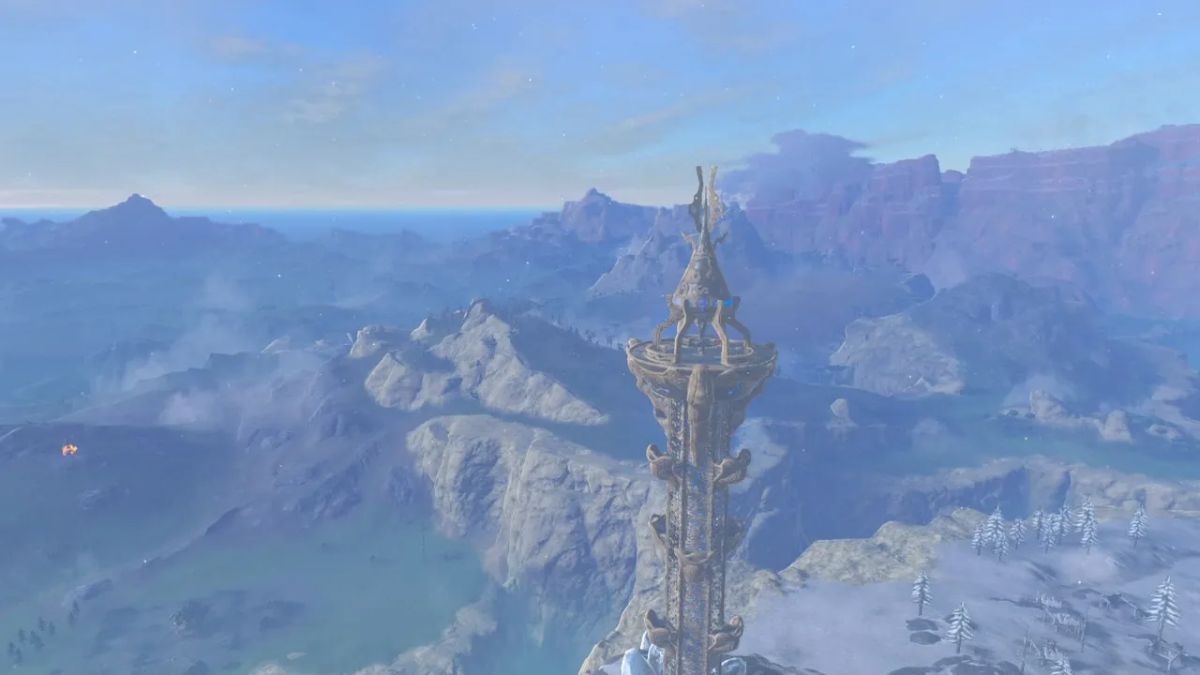
I travel to Central Hyrule, sneaking past mechanical Guardians as I attempt to activate Central Tower. These must be the very machines King Rhoam warned me about—corrupted by Ganon and responsible for the destruction of Hyrule Castle. Their relentless pursuit and devastating power make it clear: venturing off the roads or near the castle ruins is far too dangerous in my current state.
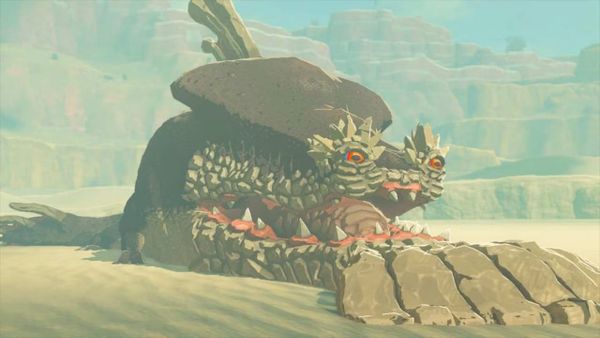
My shrine quest takes me to the Gerudo Desert, but the sandstorms and extreme climate force me to turn back. Undeterred, I head north to Tabantha, Ridgeland, and Hebra, activating towers, resting in stables, and completing ten shrines along the way. One shrine pits me against a Guardian Scout, a brutal battle that nearly depletes my weapons and arrows before I finally emerge victorious. The battle leaves me exhausted, still lacking strength and stamina despite the additional Spirit Orbs I have collected. But I begin to grow curious about my past, given the innate ability I seem to have with a sword, shield, and bow.
With no further shrine leads in the region, I turn south toward the Lake and Faron regions, activating towers and uncovering three additional shrines.
With supplies and strength running low, I return to Hateno Village to rest and resupply. Thanks to hunting, gathering, and selling shrine treasures, I have enough rupees to complete my house and spend ample time in and around Hateno and Dueling Peaks without the urgent need to seek more shrines. Now, with enhanced stamina and strength from Spirit Orbs, I begin contributing to my home region, clearing the roads and nearby woods of monster ambushes, ensuring safer passage for travelers and villagers alike.
As I leisurely explore the region, I reflect on my adventures. Outside of Hateno, Hyrule has been devastated by the Calamity. Monsters infest all corners of the land, and without my combat instincts and reflexes, I would have perished. Despite the dangers, I am taken aback by the beauty of this former kingdom. Travelers I meet speak of rumors of magic and secrets in this world. As proof, I discovered a Great Fairy named Kaysa during my journey; and she mentioned having three other sisters. The potential wonders of this land eventually draw me back to traveling. I leave Hateno properly supplied and equipped with armor, climbing gear, and a variety of elixirs, along with renewed confidence in my abilities.
I travel to a shrine on Tenoko Island before heading back to Riverside Stable. From there, I head north to activate towers. I find four shrines in Lanayru before activating the tower, which is guarded by numerous monsters. I activate the Woodland and Akkala towers, both heavily guarded by monsters. I'm becoming adept at defeating Bokoblins, Moblins, and Lizalfos.
Upon entering Akkala, I help a man defeat a Moblin; he tells me about the Akkala Citadel and its role as the Royal Guard's last stand against the Calamity. I feel a surprisingly deep sadness about this story. After a short distance, I reach South Akkala Stable. After many days of traveling, battling monsters, and completing shrines—including a battle against another guardian scout—a soft stable bed is a welcome comfort.
Akkala is as breathtaking as it is perilous. Straying from the road is treacherous—I was ambushed by Bokoblins on horseback, armed with powerful bows and fire arrows. Yet, despite the dangers, my journey through Akkala has been rewarding. I encountered Hudson from Bolson Construction, and together, we struck a deal to develop a new settlement: Tarrey Town. Along the way, I also discovered another Great Fairy, Mija, who used her magic to further enhance my armor and clothing.
My shrine quest and merchant ventures continue to flourish. With an ever-expanding inventory and steadily improving skills in cooking and elixir-making, I can now afford proper lodging at stables when I’m not out in the wild. The extra rupees also allow me to purchase key ingredients and supplies from merchants. After days on the road and the discovery of four more shrines, I decide it’s time to return to Hateno to sell off my inventory and rest.
On my way back, I take a detour through Eldin to activate the last tower I had spotted and complete an additional shrine near Foothill Stable. As I travel toward Riverside Stable and then Dueling Peaks Stable, I continue gathering resources—hunting, mining, and collecting valuable materials—before selling my inventory to my merchant contacts. By the time I finally return to Hateno Village and offload the remaining goods, I’ve amassed a large sum of rupees.
I spend the next few days enjoying a well-earned break in the village—resting, socializing, gathering wood, tending to my home, and keeping the area safe by eliminating nearby monsters.
As much as I enjoy the peaceful, laid-back life in Hateno, a sense of restlessness creeps in. I find myself longing for my next adventure. With most of my shrine leads nearly exhausted, I know I’m not suited to a quiet life as a farmer or shopkeeper bound to the village. Then, an idea strikes me—many of the monster camps I’ve encountered guard valuable treasure. With my combat skills, I could reclaim these treasures, which remain inaccessible to most travelers. It’s a dangerous pursuit, but the thought of it sparks a thrill in me.
I also realize that if I want to uncover more shrines, I can’t just keep to myself and stick to the roads. I need to engage with other travelers, investigate rumors, and explore the areas they mention. Determined to test this approach, I spend more time at Dueling Peaks Stable—speaking with wanderers, clearing the roads of monsters, and scavenging decayed Guardians for valuable parts. Alongside my usual hunting, gathering, and mining, I soon confirm that my plan has potential. In fact, my efforts lead me to two hidden shrines and a secret treasure cave once belonging to Misko the Bandit. It's clear that stables and travelers hold a wealth of useful information.
Making a greater effort to speak with the people of Hateno proves just as fruitful. Through conversation, I uncover the existence of another hidden shrine near the Alfarmsi Coast. As I continue gathering information, I compile a list of potential adventures:
- A Hylian fishing village called Lurelin lies southeast of Lake Hylia.
- A sacred Spring of Wisdom sits atop Mount Lanayru, once visited by the Hyrule princess—possibly containing hidden treasure.
- The Great Fairies Mija and Kaysa mentioned having two other sisters still trapped across Hyrule.
- Other major settlements I have yet to visit include Goron City, Gerudo Town, Zora’s Domain, and Rito Village.
However, before I chase these new horizons, I feel a responsibility to honor my commitment to Hudson. For now, my focus remains on the development of Tarrey Town.
With how much I’ve been using and experimenting with my Sheikah Slate, I’m starting to suspect it isn’t fully functional. Before leaving Hateno—likely for an extended time—my curiosity gets the better of me, drawing me toward the Tech Lab. Maybe they can help me understand my slate’s capabilities more deeply. According to the villagers, the lab’s only inhabitants are an old Sheikah woman and a child who never leave, so there seems to be little risk in revealing my secret to them.