Zelda: Breath of the Wild - Entry 4: Tarrey Town Recruiting

At the lab, the elderly Sheikah scientist confirms my suspicion: my slate is incomplete. However, fully restoring it requires approval from Impa, the elder in Kakariko Village, to ignite their furnace and power their instruments. Since I have no intention of seeking out Impa and being lectured about my so-called destiny to save Hyrule, I decide to move on.
Yet, with each Spirit Orb, I feel stronger—and the questions surrounding my past weigh heavier. Why did I awaken in the Shrine of Resurrection with the Sheikah Slate? Why did the towers and shrines react to me? And why do combat and survival feel so instinctive? These thoughts linger, but I push them to the back of my mind, avoiding Kakariko Village and any talk of the legendary warrior. I don’t want grand expectations or heroic tales. I just want the quiet, simple life of a traveler.
After spending a few more days in the village and feeling fully recharged, it’s time to hit the road again for my journey to Eldin, where I hope to recruit a Goron for Tarrey Town. Before setting out, I store some items in my house and prepare elixirs and meals for the journey ahead.
My time in Eldin proves highly productive. I discover two shrines, clear three monster camps, mine valuable ore, and even acquire a piece of armor to protect me from the volcano’s intense heat. Most importantly, I successfully recruit a Goron for Tarrey Town. I also hear about a potential profitable mining venture in Goron City—something I may revisit in the future. However, with the city still struggling with the lingering effects of the Great Calamity, I decide it’s best to keep my distance for now.
Loaded with wood and eager to check in with Hudson and Greyson, I make my way back to Tarrey Town. After assessing the town’s progress, we determine that our next priority is finding a tailor or clothing merchant from Gerudo. With a new goal in mind, I prepare for the next leg of my journey.
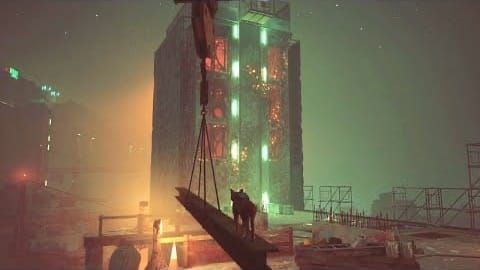
From Tarrey Town, I set out for East Akkala Stable. While there, I hear about another sacred spring and a tech lab located just a short distance to the north. Curious, I decide to visit the lab, hoping the director might have solutions for my incomplete Sheikah Slate. The place seems abandoned—the door is unlocked, and no one is around. Inside, I catch a glimpse of a malfunctioning robot crafted from materials similar to those found in shrines and towers. Not wanting to get caught snooping, I quickly slip back out.
During my travels, I’ve heard rumors of a merchant who specializes in monster parts, reportedly spotted near Skull Lake, just northwest of the stable. Since I’ve been raiding monster camps and have an abundance of monster parts, I decide to investigate, hoping for a potential business opportunity. Sure enough, I meet Kilton, an eccentric merchant who’s starting a unique shop called Fang and Bone, offering monster-inspired goods. Since he hasn’t officially opened for business yet, I’ll need to meet with him again later to discuss the details.
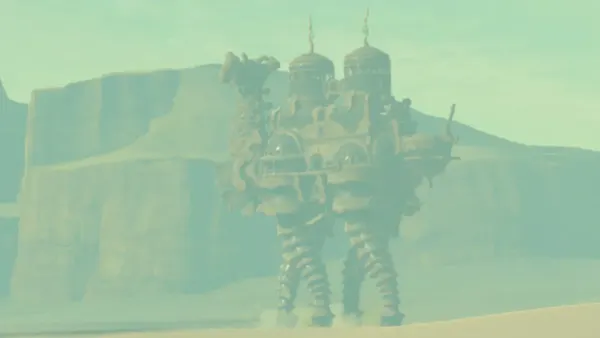
From East Akkala Stable, I make my way to Gerudo Canyon Stable to pursue the next phase of Tarrey Town’s expansion. As I head into the desert, just before reaching the Kara Kara Bazaar oasis, I witness a massive, camel-like machine raging through the sands, creating lightning storms and sand tempests. I hear Zelda’s voice in my mind, urging that it needs to be freed—by me. The Gerudo at the oasis refer to it as a Divine Beast, one of the entities King Rhoam spoke of before I left the Great Plateau.
Due to the desert’s harsh conditions, I stick close to the oasis and roads, venturing out only at night when it’s cooler. While relaxing at the oasis, I meet and recruit Rhondson, a talented tailor, to join Tarrey Town. I also spot a shrine just outside the walls of Gerudo Town, along with the last Sheikah Tower and what appears to be another shrine hidden within an area plagued by frequent sandstorms—storms that seem to calm after sunset. After exploring the shrines and activating the tower, I treat myself to one final day of rest at the Kara Kara Bazaar inn before starting my journey back to Akkala.
From conversations with merchants and travelers, I learn that Gerudo Town offers lucrative opportunities for trade. However, it’s strictly accessible to women, which means I’ll need to get creative. There are rumors of a Hylian “woman” who managed to gain entry—I make a note to investigate this further. But first, I need to check in with Hudson back in Tarrey Town.
As I make my way back through Gerudo Canyon to Outskirt Stable, I raid and loot several monster camps and help a stranded traveler tame a wild horse after freeing it from a Bokoblin. This encounter makes me realize that I need more horses. Samwise has been a trusty companion, but he’s better suited for shorter trips around Hateno and Dueling Peaks—not the long, treacherous journeys across the broader lands of Hyrule. With my merchant business growing and a larger purse of rupees, I’m in a good position to invest in more supplies, equipment, and, of course, a new steed.
At Outskirt Stable, I hear about a rare white horse breed known for its strength, speed, and remarkable stamina, along with reports of a valuable herd roaming near Safula Hill. While exploring the area, I come across the white horse, and strangely, we form an immediate bond—as if we’ve ridden together in another life. I name her Phoenix. An old man at the stable notices her and tells me this breed is a descendant of the horse once ridden by Princess Zelda. To honor that connection, he gifts me a special royal harness, a relic from before the Calamity.
As I continue my journey to Tarrey Town on Phoenix, my mind keeps drifting back to the voice I heard when I awoke in the Shrine of Resurrection—and again in the desert, urging me to free the Divine Beast. It felt so familiar, pulling at something deep within me, as if I’m bound to protect whoever is calling out. But I set those thoughts aside when I reach Tarrey Town; there’s still much work to be done.
Arriving with a fresh load of wood, I’m thrilled to see the town’s progress. Hudson, Greyson, and Rhondson all greet me with genuine happiness, proud of how far Tarrey Town has come. After checking in with them, Hudson and I decide that the next priority is to recruit a traveling merchant—someone who can manage distribution and ensure a steady flow of supplies. A Rito would be ideal for the job, given their speed and range.
During my visit, I also meet with Kilton to finalize the details of our business arrangement. His flagship product is an unusual extract that enhances the properties of other ingredients—something that could prove valuable for both trade and survival. With new goals set and partnerships secured, Tarrey Town continues to grow, and so does my journey.
After spending a few days in Tarrey Town, I set out toward Tabantha and Rito Village. From Tabantha Bridge Stable, I continue on foot to avoid drawing the attention of flying Guardians—fearing they might easily kill both me and my horse.
Upon arriving in Rito Village, I learn that the area is being terrorized by another Divine Beast, which likely helped convince Fyson to join Tarrey Town as the new supply merchant. While there, I sneak into a shrine in the middle of the night. I also spot another shrine nearby and receive a potential adventure lead from a Rito child, but it’s deep in the Hebra Mountains, so I decide to hold off for now.
The area around Lake Tatori is stunning—aside from the ominous Divine Beast circling overhead. I take advantage of the cool weather and towering trees, chopping wood to bring back to Hudson in Tarrey Town. On my return trip, I spend some time at Tabantha Bridge Stable, exploring areas recommended by the stable owners and passing travelers. My efforts pay off: I discover a hidden shrine and obtain some rubber gear for protection against electricity from the Thundra Plateau.
After my time around Tabantha Bridge Stable, I head straight back to Tarrey Town. It’s thriving, with new villagers moving in and Fyson’s store now open for business. While there, I help a family whose daughter refuses to eat by making her a cake with Kilton's Monster Extract product. Hudson also shares some exciting news—he and Rhondson are engaged! They’re hoping to find a Zora priest to officiate their wedding, so I set out to find one.
I travel to Riverside Stable, ready to begin my search for a Zora priest. However, my passage through the Lanayru Wetlands is slow, with numerous Lizalfos scouts blocking the way. Along the road, I’m stopped by several Zora who deliver a message from Prince Sidon, requesting to meet with me. Another traveler warns me that Sidon is specifically looking for a Hylian warrior to help the Zora. Not wanting to get involved in their conflict, I abandon my search for a Zora priest—for now. Hudson and Rhondson’s wedding will have to wait a bit longer.
At this point, I decide to return to Hateno to tend to my house, store supplies, and get some much-needed rest. As I consider my next venture, curiosity gets the better of me regarding Kakariko Village—and since it’s a faster route home, I make a quick detour to scope it out. The village has its own shrine and a heavily guarded home, which I suspect belongs to the elder, Impa. On my way back, I stop at Dueling Peaks Stable for a day to harvest some swift violets before finally heading home.
While resting at home in Hateno, I start reflecting on my next steps. Based on the information and rumors I’ve gathered throughout my travels, I consider the following objectives:
- Find Lurelin Village, a Hylian fishing village southeast of Lake Hylia.
- Seek out the Sacred Springs once visited by Princess Zelda, rumored to contain treasures or magical artifacts.
- Free the remaining Great Fairy sisters—Mija and Kaysa mentioned they have two other sisters across Hyrule who can enhance my gear.
- Explore Hyrule Castle, said to be filled with treasure, powerful weapons, ancient recipes, and secrets from before the Calamity.
- Search for the legendary sword rumored to be hidden somewhere within the Woodland region.
- Investigate points of interest: Satori Mountain, Washa Bluff, and the Hebra Mountains/Pass.
I enjoy the relative safety of Hateno, taking short excursions to explore nearby areas I’ve yet to visit. One night, while reflecting by my campfire, it hits me: to find more shrines, treasures, and answers, I’ll need to venture deeper into the wild—territories where I’ll face stronger monsters and larger hoards. This means I need better, upgraded equipment to withstand harsher environments and deadlier foes. The fairy sisters will be key to enhancing my gear, but I’ll need to find their hidden fountains first.
The Gerudo Desert stands out as my next major destination. Its harsh climate, the rogue Divine Beast causing chaos, and the city’s ban on male merchants make it too dangerous or inaccessible for most travelers. This presents unique merchant opportunities—and an advantage for me. I’ve also heard rumors from a Gerudo traveler at Kara Kara Bazaar about another Great Fairy hidden deep within the desert.