Zelda: Breath of the Wild - Entry 13: Forgotten Temple

I leave Lurelin Village with a newfound sense of determination and purpose—to seek out all the remaining shrines scattered across Hyrule. My next destination is Highland Stable, and I decide to travel there via the rugged coastline of Martha’s Landing Beach. The area is crawling with Lizalfos and even a roaming Guardian, but amidst the danger, I discover a shrine platform and an orb resting nearby. However, the orb is "guarded" by a woman who refuses to part with it unless I trade her pictures of Guardians. Fortunately, I have several photos stored on my Sheikah Slate, and after showing them to her, she agrees to hand over the orb. I place it on the pedestal, triggering the appearance of the hidden shrine.
With the shrine complete, I continue my journey to Highland Stable. Now that I’ve grown confident in facing even the most formidable foes, I decide to explore the Oseira Plains and the Taobab Grasslands—areas I had only glimpsed briefly when I first encountered and rode Sparta through the region. As I enter the vast, open plains, I’m quickly ambushed by a Bokoblin cavalry on horseback. I deal with them swiftly, using precise archery and well-timed strikes.
While scanning the horizon, I notice what appears to be a smoke signal rising from the cliffs. Curious, I set a course to investigate. Upon arrival, I discover that the "signal" is nothing more than someone attempting to cook—very badly—resulting in thick, dark smoke. Although it wasn’t the distress signal I expected, the detour proves worthwhile, as I stumble upon a hidden shrine tucked within the cliffside.
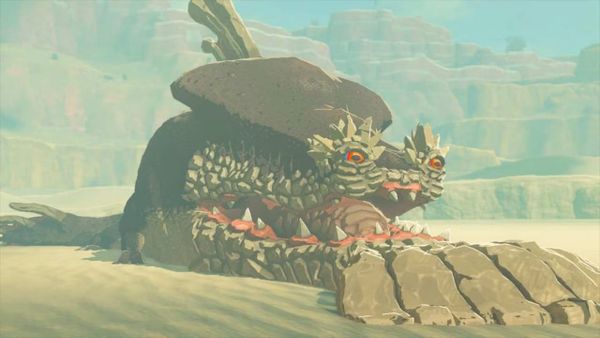
My exploration of the area doesn’t stop there. I engage in fierce battles, defeating a powerful Lynel, a towering Stone Talus, and even two Stalnox that emerge under the cover of night. Each victory strengthens my resolve and sharpens my skills.
Feeling satisfied with my journey through the Lake and Faron regions, I decide it’s time to return to the Tabantha and Ridgeland regions. I recall hearing rumors about unusual happenings and remember spotting what looked like a shrine platform at Washa’s Bluff. On the way, I take the opportunity to explore the western edges of Hyrule Field, making camp at Outskirt Stable as a resting point.
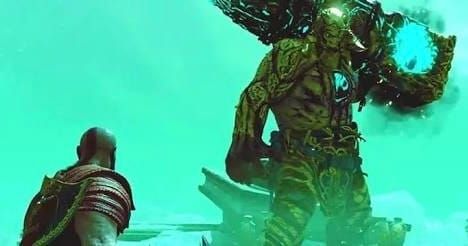
During my travels through this region, I uncover fascinating landmarks: the ruins of an ancient coliseum teeming with formidable monsters, a giant tree stump that seems to echo with the whispers of the past, the crumbling remains of the Sage Temple Ruins, and deep within the shadows of the Giant’s Forest, I face off against a fearsome Hinox.
Each discovery, each battle, and each shrine draws me closer to my destiny. Hyrule’s secrets are vast, but I am determined to uncover them all.
When I finally arrive at Washa’s Bluff, I spot the shrine platform nestled among the landscape. To my surprise, I also see Kass perched atop one of the iconic, towering mushroom-like rock formations unique to the area. Curious, I climb up to meet him and discover what appears to be his makeshift home—a small structure with a journal filled with notes and lyrics from all his ancient songs.
After greeting Kass, he shares with me the lyrics of an ancient song tied to this region. Based on the clues, it seems that to reveal the shrine, I must stand on the shrine platform during a Blood Moon—wearing nothing but my underwear. Since I have to wait for the next Blood Moon, I take the opportunity to explore the nearby areas, including the mystical Satori Mountain.
One night, as I’m camping near the base of the mountain, I notice a strange, ethereal glow emanating from its peak. Driven by curiosity, I make the climb to investigate. Near the cherry blossom tree that overlooks a small wetland area, I quietly approach, careful not to disturb the serenity. There, bathed in the moonlight, I see the most breathtaking, otherworldly creature. Surrounded by shimmering Blupees, it stands majestic—a glowing, horse-like being with the head of an owl, a lion-like mane, and antler-like fronds sprouting from its head. I watch in silent awe, captivated by its beauty, until it vanishes with the first light of dawn, leaving me with a sense of wonder I’ll never forget.
Eventually, I witness the sky begin to shift—the ominous red hue of the Blood Moon rising. Wasting no time, I paraglide from Satori Mountain straight toward the glowing shrine platform. As I land, I strip down to my underwear, and the moment I step onto the platform, it activates with a radiant pulse, causing a hidden shrine to rise dramatically from the ground.
After completing the shrine trial and receiving the monk’s blessing, I travel to Tabantha Bridge Stable to rest. While chatting with the stable workers, one of them points out some strange etchings they’ve spotted on the side of a mountain in the Gerudo Highlands. Intrigued, I make a mental note to investigate when my journey eventually takes me to that arid, mysterious region.
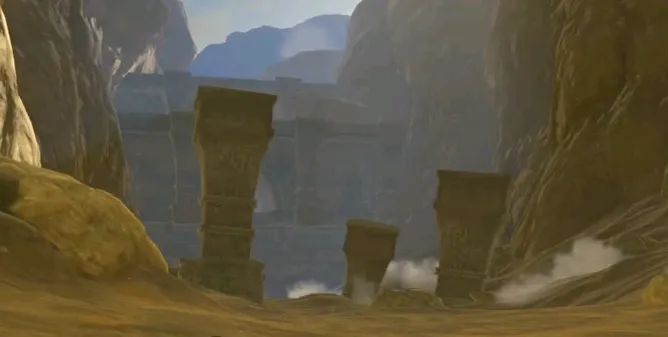
After some low-key exploration around the Seres Scablands, Ludfo’s Bog, and Mount Rhoam, I decide it’s time for a new adventure. I saddle up Sparta and head west, determined to ride down into and explore the depths of Tanagar Canyon. On the way, I pass the Illumeni Plateau, where I defeat a Stone Talus at the summit, and continue past Lake Illumeni toward an area that gradually descends into the canyon.
Before heading down, though, something just north of my path catches my eye. My curiosity gets the better of me, so I detour to investigate. There, hidden beneath a large stone slab, I discover a crack in the ground leading to an underground cavern. Inside, I find a shrine tucked away in the darkness. After completing the trial and receiving the monk’s blessing, I finally make my descent into Tanagar Canyon.
The canyon is eerily quiet, its vastness broken only by a Goron running a strange golf-like game, a few scattered monsters, and packs of wild wolves roaming the barren stretches. Just when I think the canyon might be emptier than I’d hoped, I stumble upon another shrine nestled against the canyon wall, offering another monk’s blessing.
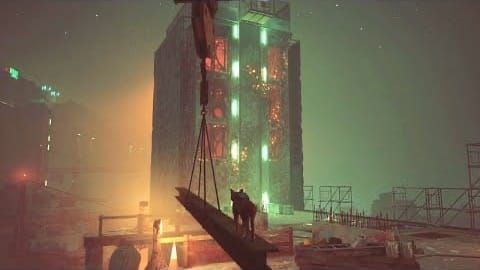
As I continue deeper, nearly ready to give up on finding anything significant, I come across a sight that takes my breath away—a massive stone temple carved into the rock at the very end of the canyon. Determined to uncover its secrets, I fend off a group of Bokoblins on horseback before scaling the crumbling ruins. I spot what looks like an entrance and make my way inside.
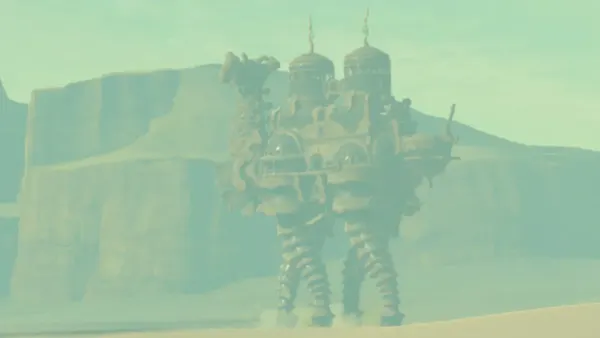
The interior is vast and ominous, a long corridor divided into sections with updrafts rising from the cracked floor. All around me lie what appear to be decayed Guardians, lifeless and inert—or so I think. The moment I step further inside, they suddenly activate, their red targeting lasers locking onto me all at once.
My instincts kick in. I sprint toward the edge of a platform, leap off, and catch an updraft with my paraglider, narrowly dodging a barrage of deadly lasers. As the Guardians fire, I drop from the paraglider mid-air, letting their shots sail harmlessly past me. Before hitting the ground, I catch another updraft, repeating this heart-pounding maneuver to weave through the chaos.
Eventually, I glide through a doorway at the far end of the temple, escaping the Guardians’ relentless lasers. Inside, against the back wall, stands a massive goddess statue, its serene presence a stark contrast to the peril I just faced. In the center of the room, glowing faintly, is another shrine. After completing the trial and receiving the monk’s blessing, I leave the temple, my heart still racing from the ordeal.
Exhausted but exhilarated, I return to Tabantha Bridge Stable to rest, reflecting on the incredible sights—and dangers—that Tanagar Canyon had hidden within its depths.